Key Takeaways:
- A proper suspension setup is crucial for a smoother bikepacking experience
- Understanding suspension components and choosing the right bike are key to a successful setup
- Regular maintenance and fine-tuning for various terrains can maximize suspension performance
- Professional help and success stories from other bikepacking enthusiasts can provide valuable insights
Understanding Suspension Components
When it comes to bikepacking trips, having a properly tuned suspension setup can make all the difference in ensuring a smoother ride on various terrains. Understanding the key suspension components found on bikepacking bikes is essential in achieving this.Suspension Fork
The suspension fork is a critical component of any bikepacking bike, providing cushioning for the front wheel as it encounters rough terrain. A suspension fork works by compressing and rebounding in response to bumps and impacts. The degree of compression and rebound is controlled by the rider via settings in the fork.Full Suspension Bikes
Full suspension bikes, as the name suggests, feature suspension both in the fork and the rear of the bike. This provides added cushioning and control on technical terrain, making the ride more comfortable and stable.Dropper Post
A dropper post allows the rider to adjust the height of the saddle on the fly, providing optimal positioning for climbing, descending, and technical riding. This can be achieved via a remote lever on the handlebars, allowing the rider to quickly and easily make adjustments while riding. Understanding the function and role of each component is crucial in optimizing your suspension setup for bikepacking trips. Next, we’ll discuss how to choose the right suspension bike for your adventure.Choosing the Right Suspension Bike for Bikepacking Trips
When it comes to bikepacking trips, having the right suspension bike can make all the difference in the comfort and control of your ride. There are several types of bikes to consider, including mountain bikes, gravel bikes, and dedicated bikepacking bikes. If you plan on riding technical terrain, full suspension bikes are the way to go. They offer added shock absorption and allow for better control over rough terrain. If you’re planning to ride mostly dirt roads or gravel roads, a hardtail mountain bike or gravel bike with front suspension may suffice. Another factor to consider is tire clearance. Bikepacking bikes typically have larger tire clearance to accommodate for the added weight of gear. Additionally, dropper posts can be a helpful feature for technical riding, allowing for quick and easy adjustments in saddle height. Ultimately, the best suspension bike for your bikepacking trip will depend on your individual needs and preferences. Consider the terrain you will encounter and the amount of gear you plan to carry, and test ride different options to find the perfect fit.Setting up Your Suspension for Bikepacking Trips
When it comes to suspension setup for bikepacking trips, finding the right balance between comfort and control is key. Technical riding demands a well-tuned suspension setup that can handle various terrains and unexpected obstacles. At the same time, personal preference plays a role in determining the optimal suspension adjustments for each rider. Hydraulic brakes are an essential component of a properly functioning suspension setup. Ensuring that they are maintained and performing at peak capacity is crucial for safe and effective bikepacking. With that in mind, let’s delve into the details of setting up suspension for optimal performance on bikepacking trips.Adjusting Your Suspension Settings
The two critical settings to pay attention to are sag and rebound. Sag refers to the amount of compression on the suspension when the rider is positioned in a neutral stance on the bike. It’s typically recommended to aim for about 25-30% sag on full suspension bikes. However, personal preference can vary, and some riders may prefer more or less sag depending on their weight and riding style. Rebound refers to the speed at which the suspension returns to its uncompressed state after being compressed. Adjusting rebound settings is crucial in ensuring a smooth and controlled ride. If rebound is too slow, the suspension won’t return to its uncompressed state quickly enough, leading to a sluggish bike response. If rebound is too fast, the suspension won’t have enough time to absorb impacts, leading to a bumpy and uncomfortable ride. Compression settings are also an essential factor in optimizing suspension performance. They control how much the suspension compresses when encountering obstacles. It’s recommended to start with the manufacturer’s recommended settings and adjust from there based on personal preference and the demands of the terrain.Personal Preference and Technical Riding
Personal preference plays a significant role in determining optimal suspension adjustments. While some riders may prefer a stiffer ride for maximum control, others may prefer a more comfortable and plush feel. It’s essential to take time to experiment with different settings to find the best balance between comfort and performance. Technical riding demands a different approach to suspension setup. When tackling challenging terrain, it’s essential to have a suspension setup that can handle sudden impacts and unexpected obstacles. Adjusting compression and rebound settings can help optimize suspension performance for technical riding, providing a smoother and more controlled ride. Keeping hydraulic brakes in top shape is crucial in technical riding. Ensuring that brake pads are changed regularly and that brake lines are bled when necessary is necessary for optimal brake performance. In conclusion, finding the right suspension setup for bikepacking trips is a balance between comfort and control, taking into account personal preference and the demands of technical riding. By adjusting sag, rebound, and compression settings, riders can optimize suspension performance for various terrains and ensure a smoother and more comfortable ride. Maintaining hydraulic brake performance is essential for safe and effective bikepacking, particularly when tackling technical terrain.Bikepacking Bags and Suspension Considerations
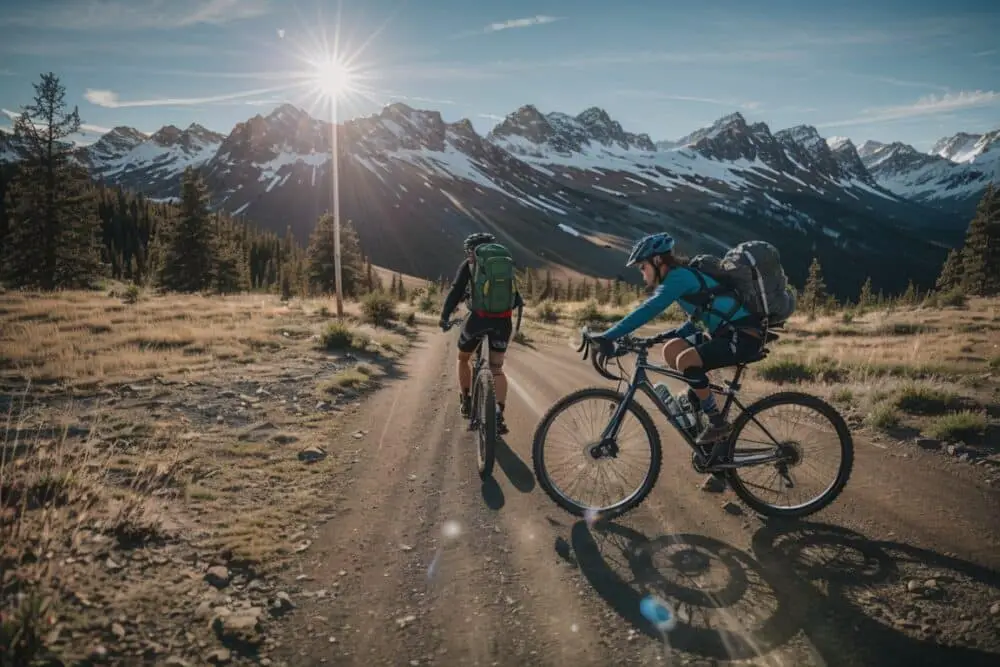
When it comes to bikepacking trips, having the right gear is essential for a comfortable and enjoyable ride. This includes not only your suspension setup but also the way you pack your gear. The three types of bikepacking bags are the frame bag, the handlebar bag, and the saddle bag. Each serves a different purpose and has a unique impact on suspension setup.Frame Bag
The frame bag is the largest of the three bags and is typically used to store heavy items like food, water, and tools. When packing your frame bag, it’s important to consider weight distribution. Placing heavy items at the bottom of the bag can help lower your center of gravity and improve bike handling. Another important consideration is frame bag placement. Make sure the frame bag doesn’t interfere with your suspension components or your ability to access them for adjustments.Handlebar Bag
The handlebar bag is typically used to store lightweight items like clothing and sleeping gear. However, the positioning of the handlebar bag can affect the handling of your bike. If the bag is too heavy or placed too high, it can throw off the balance of the bike and make it more difficult to control. Properly securing the handlebar bag is also important. If the bag bounces or moves around during your ride, it can cause distractions and impact your ability to control the bike.Saddle Bag
The saddle bag is used to store medium-weight items like food and spare clothing. When packing your saddle bag, it’s important to consider weight distribution. Placing heavier items towards the back can help improve bike handling and center of gravity. It’s also important to make sure the saddle bag doesn’t interfere with your suspension components or your ability to access them for adjustments. By properly considering the type and placement of your bikepacking bags, you can enhance the overall performance and comfort of your suspension setup on your bikepacking trips.Fine-Tuning Your Suspension for Different Terrains
When it comes to bikepacking trips, the terrain can vary greatly from technical singletrack to dirt roads and even gravel highways. Fine-tuning your suspension setup for each type of terrain can make a significant difference in your comfort and control on the bike.Adjusting Suspension for Technical Terrain
Technical terrain includes rocky trails, steep descents, and other challenging features. For these types of terrain, it’s important to have more compression in your suspension to help absorb impacts and maintain traction. Adjust your suspension settings to a higher pressure for a more rigid ride.Suspension Setup for Dirt Roads
Dirt roads require a different suspension setup than technical terrain. These roads are often smoother, but can still be bumpy and uneven. For dirt roads, adjust your suspension to a lower pressure to allow for more movement and a smoother ride. This will also help maintain better control on loose surfaces.Suspension Setup for Gravel Roads
Gravel roads are a unique type of terrain that require a balance between suspension and tire pressure. Adjust your suspension to a medium pressure to help absorb impacts on rough surfaces, while maintaining a stable ride. Additionally, consider adjusting your tire pressure for better grip and traction on loose gravel.The Impact of Front Wheel Traction on Suspension Performance
Front wheel traction can have a significant impact on your suspension performance. When descending a steep hill, weight automatically shifts forward, resulting in more pressure on the front wheel. Adjust your suspension for steeper compression, so that your front wheel can absorb impact and maintain traction.Suspension Setup Tips for Long Bikepacking Trips
When planning a long bikepacking trip, one of the most important factors to consider is your suspension setup. A well-tuned suspension can mean the difference between an enjoyable, comfortable ride and a painful, exhausting experience. Here are some suspension setup tips to keep in mind for your next long bikepacking trip:- Consider handlebar bags: Adding handlebar bags to your bikepacking setup can add significant weight to the front of your bike, affecting the way it handles. Be sure to adjust your suspension settings accordingly to ensure a balanced ride.
- Choose a gravel bike: Gravel bikes are becoming increasingly popular for long bikepacking trips due to their comfortable, versatile design. They offer more compliance than traditional mountain bikes and are suited for a wide range of terrains.
Getting Professional Help with Suspension Setup
While setting up your suspension for bikepacking trips can be a rewarding and fun experience, it can also be quite complex. If you’re feeling overwhelmed or unsure about adjusting your suspension on your own, consider seeking professional help at your local bike shop. Bike shop mechanics have the expertise and experience to help you dial in your suspension for optimal performance. They can also advise you on bikepacking-specific setups that are tailored to the demands of technical riding adventures. For example, they may recommend specific suspension components or adjustments that can enhance stability, comfort, and control on long trips. In addition to providing advice and guidance, local bike shops can also perform routine maintenance and repairs on your suspension. They can help you clean and lubricate fork legs, inspect seals and bushings, and replace worn or damaged parts as needed. This can help extend the life of your suspension and ensure it performs well on every bikepacking adventure. Overall, seeking professional help with suspension setup can be a great investment in your bikepacking experience. With the right guidance and support, you can achieve a well-tuned suspension setup that enhances your overall performance and enjoyment on the trail.Essential Suspension Maintenance for Bikepacking Trips
Proper suspension maintenance is key to achieving optimal performance and a smooth ride on bikepacking trips. Here are some essential tips for keeping your suspension setup in great condition:Clean and Lubricate Fork Legs
Regular cleaning and lubrication of fork legs can prevent dirt and debris from damaging the suspension components and help maintain the smoothness of the ride. To start, wipe down the fork legs with a clean cloth or rag to remove any debris or dirt. Next, use a suspension-specific lubricant to grease the fork legs and improve their performance. This should be done every few rides, depending on the terrain and weather conditions.Protect the Down Tube
The down tube is an essential part of your bike’s frame that protects the suspension components from damage caused by dirt and debris. Apply a layer of electrical tape to the down tube to protect it from scratches and prevent potential damage. Make sure to replace the tape regularly to ensure continued protection.Check Hydraulic Brakes
Hydraulic brakes are essential for bikepacking trips and should be checked regularly to ensure they are functioning correctly. Check the brake pads for wear and replace them as needed. Inspect brake lines for any leaks or cracks and replace them if necessary. Also, check the brake fluid level and top up if needed.Tighten Bolts and Screws
Make sure all bolts and screws on your bike’s suspension setup are tightened properly. Loose bolts and screws can lead to poor performance and even damage to your bike. Use a torque wrench to ensure all bolts and screws are tightened to the manufacturer’s specifications. By following these essential suspension maintenance tips, you can ensure your bike’s suspension setup is in great condition and ready for any bikepacking adventure.What Gear Should I Have for a Successful Bikepacking Trip?
Planning a bikepacking adventure? Find all the answers in the ultimate bikepacking gear guide. Essentials include a sturdy bike with suitable tires, bikepacking-specific bags, lightweight tent and sleeping bag, multi-tool, first aid kit, headlamp, and a reliable GPS.